
After my bowel cancer surgery, waking with a colostomy bag was something of a shock. Particularly as I’d got my mind around the idea that I’d have an ileostomy bag, if anything. I just wasn’t expecting it…
The funny thing is, that a colostomy bag is actually probably easier then an ileostomy bag. Not that I knew that when I was waking with a colostomy bag. At that point I had no idea what was happening and what to expect.
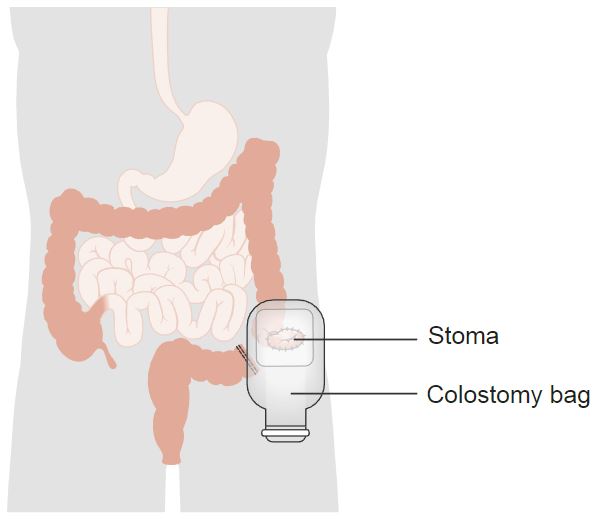
The colostomy bag was placed over the exciting new feature that was my stoma. A stoma is the point at which a part of your intestine exits your body through your abdominal wall.
The part of your intestines that have been used to make the stoma, dictates what is is called. If the small intestine (the ilium) is used, the stoma is an ileostomy. If the large intestine (the colon) is used, the stoma is a colostomy.
Typically, there are two types of both ileostomy and colostomy; the loop version, or; the end version.
What I had been expecting was a loop ileostomy, where a loop of the small intestine is pulled through the abdominal wall and cut part way through. This allows the faeces to leave the digestive system before it reaches the large intestine, allowing the repairs to the large intestine time to heal. The main reasons I had been expecting a loop ileostomy were:
- That’s what my dad had after his bowel cancer surgery, and;
- The surgeon had marked a cross on the ileostomy side, prior to surgery.
An ileostomy tends to be on the left side of the abdomen, while the colostomy tends to be on the right.
But I didn’t get an loop ileostomy, what I got was an end colonoscopy. This is where the end of the large intestine is pulled through the abdominal wall to allow defecation.
The reason for this was that the surgery was quite extensive and a reasonable amount of the bowel was removed. To complicate matters, the bowel had ruptured, leaving me full of… problems. This resulted in the likelihood of massive infection, so the chances of the two ends of the bowel resealing properly in that environment were slight. Hence I was waking with a colostomy bag.
The stoma dealt with one of the open ends. The other open end, the one that lead to the outside, was folded over and stapled shut very close to the rectum. This was because the location of the tumour was very close to the rectum. It was strange to think about; almost like a little, inverted tail…
So, anyway, there I am, lying in bed with tubes coming out of everywhere, still fairly high from the anaesthetic when I get introduced to a stoma nurse. She was a very good nurse, no question, and nothing solves the confusion of waking with a colostomy bag like a good stoma nurse.
Fortunately, my stoma was only going to be a temporary measure, but I had three more months of chemotherapy to get through before a reversal could even be considered. I figured I’d have it for about six months, which didn’t seem too bad. As it turned out, I was very, very wrong about the timescale.
It took the better part of 10 days for my digestive system to start working again, which made it easy for the stoma nurse to train me how to change my bags. She gave me a booklet to read and provided me with a bunch of bag-changing supplies. Within a couple of days, I was able to change it myself. Once the stoma nurse was satisfied I could do it properly, she arranged an appointment for a week’s time and, largely, left me to it. To be fair, and thankfully, it wasn’t that complicated.
The colostomy bag is an example of what’s known as an ostomy pouching system. It is a method of collecting waste from the large intestine, through the stoma, in a clean and hygienic manner. There are actually a dizzying array of available options, just for colostomy bags. Every option, is also available in many makes, styles and sizes:
- Open-ended, reusable bags;
- Closed-ended, disposable bags;
- Wafers that don’t actually have a bag, mainly used with irrigation;
- Plugs that don’t need a bag, mainly used when discretion is needed.
Ii didn’t take long until I was missing waking with a colostomy bag, when I was still blissfully ignorant of all the choices available to me.
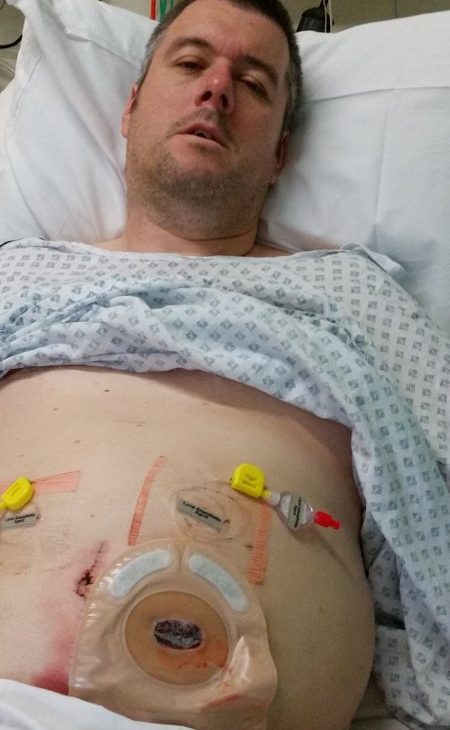
Upon waking with a colostomy bag, though, I had the open-ended reusable variety. But with a clear front, so the medical staff could check the condition of the stoma. It looked something like this:
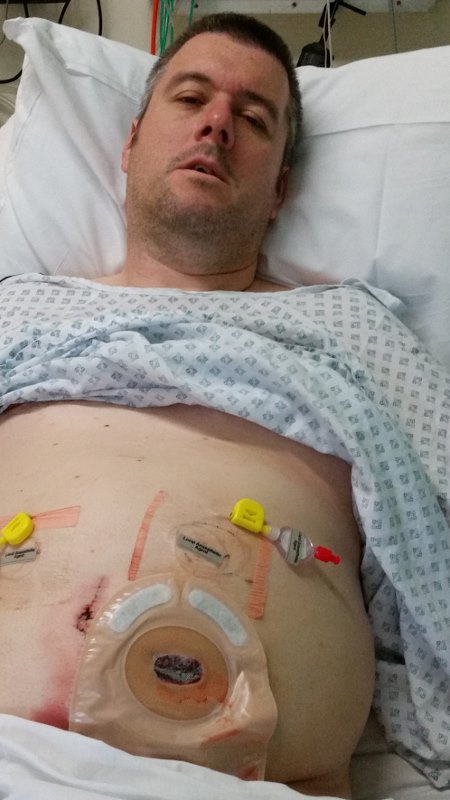
The open-ended element is not visible in this photo, but then I don’t imagine anyone would want to see that far South! The two white arcs at the top are actually filters. This allows any… air… that passes though the system to escape the bag without inflating it. The filters, incidentally, don’t always work that well, especially after a few hours.
The way all of the bags and options work is that they’re glued to your body. The other side of the bag, from the side visible in the photo, has a self-adhesive patch. You peel the protective film from the self-adhesive patch, line the patch up over the stoma, and press down. The heat from pressing it activates the adhesive and it’ll stay on for hours.
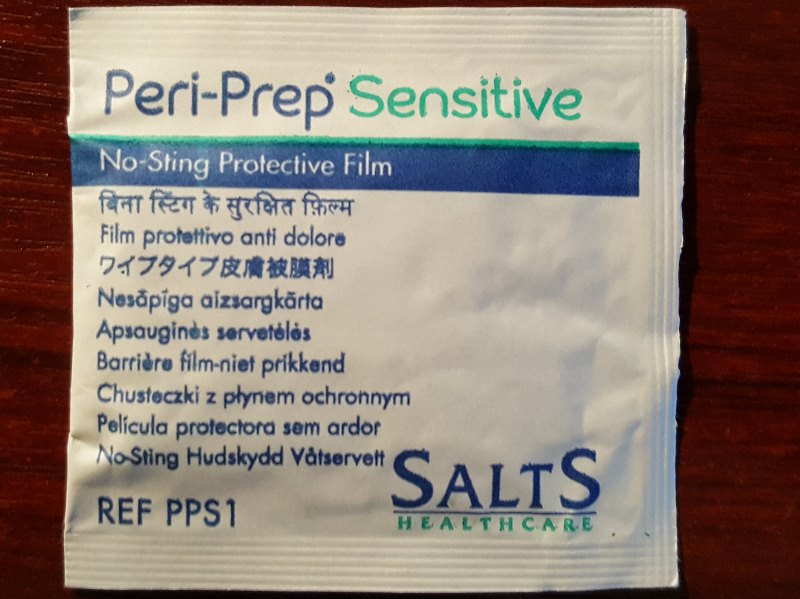
The lack of irritation is also helped by applying the Peri-Prep wipe (see photo, below), before putting the next bag on. The Peri-Prep is both protective to the skin and sticky to everything it touches. This is a great way of making sure the bag stays on, but also a great way of driving you spare, if you don’t like sticky fingers…
To remove the colostomy bag requires degrading the adhesive. There is a spray provided for this very purpose. The spray is extremely effective and spraying before you’re absolutely ready can be somewhat problematic. The adhesive can also degrade during heavy exercise, when you’re hot and sweaty, and in a long, hot shower. Neither of these is something you want. Seriously!
After the spray has been applied and the bag removed, the spray residue needs to be washed off to allow the next bag to adhere. The area needs washing anyway, for obvious reasons. Funnily enough, the bag being glued to you for months at a time, causes very little irritation. However, any waste getting on your skin, can lead to a ‘nappy rash’ in a matter of hours.
As awful and disgusting as this sounds, it’s a regrettably easy thing to do. The stoma has no muscles associated with it, no sphincter. It also has no nerves to speak of. This means that things can exit the stoma without you even being aware of it. In addition, the lining up of the hole in the colostomy bag, exactly over the stoma, is a delicate business. You can’t always see what’s happening. And if the adhesive surface touches the stoma in the process of setting it in place, you won’t be aware of it until you replace the bag, some hours later.
Because of this, and because of the delicate nature of the stoma, a powder is provided to prevent infection. This is only really used in the early days, while the stoma is shrinking to its final size and you’re still getting used to applying the bags. The powder’s very effective, though; sprinkle it on any soreness and it clears right up. And even after the powder is no longer an option, there’s always the Peri-Prep Wipe…
And the stoma does shrink. A lot. The reason for this is that it starts off bruised and swollen from the process of the surgery. As the swelling goes down, so does the diameter of the stoma. This is important for the user, because a hole needs to be cut into the adhesive pad, that is exactly the same size and shape as the stoma. This is so that none of the skin is exposed to the waste, as it collects. Because that causes a rash, which hurts.
To start with, each bag you use needs to have the hole cut in the adhesive pad locally. Either by you or by a stoma nurse. The stoma nurse will expect you to take over the cutting duties as soon as possible. Stoma nurses have more pressing things to do, while, after waking with a colostomy bag, the patient is often just lying in bed.
The size of the hole to cut, is worked out using a protective film that has been peeled off the adhesive pad of another bag. This film is offered up against the stoma and the shape is sketched on the other side of the film with a marker pen. This shape is then cut out and the film is used as a template for the next few bags. The template film is lined up over the film of the next bags, and the shape is drawn on. This shape is then cut out of the new bags, ready for use.
This process needs to be repeated every couple of days for two or three weeks, until the size of the stoma settles down. At this point, a formal template can be made and sent off to the suppliers. The suppliers than recreate the template and use it to pre-cut whole boxes of colostomy bags, which are then sent to your home on a regular basis.
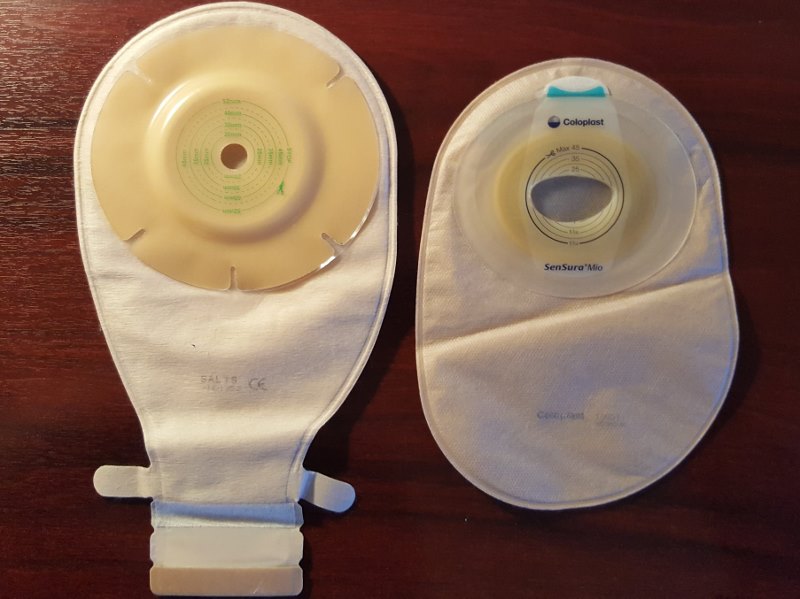
The bag on the left is reusable and has an uncut adhesive pad. It also has a convex pad, to better fit those people who develop concave areas around their stoma. As a result of weight gain… or a hernia… people like me!
The bag on the right is of the disposable variety. It also has the adhesive patch cut to the correct shape of my stoma, as it was at the end.
I had to visit the stoma nurses a couple of times before they agreed that the size of my stoma had stabilised. These visits were fairly awkward because they involved the stoma nurse taking off the colostomy bag and making measurements. And, as I have said, there is no control over what the stoma does, and when. As such, accidents happen. Stoma nurses deserve an awful lot of credit for what they do…
And that was nothing compared to what would come later on; the training for irrigation. But I’ll leave that aspect, choosing colostomy bags or irrigation, for next time. The time from waking with a colostomy bag to leaving the hospital is more than enough gruesome memories for one day.